Want to make your PowerPoint presentations more visually impactful?
One way to do this is by turning pictures into black and white.
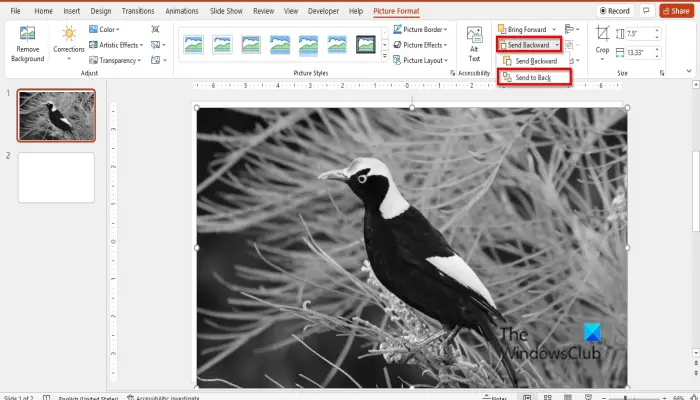
From highlighting specific elements to creating a vintage look, this step-by-step guide will show you how to easily transform your images in PowerPoint. To turn a picture into black and white in PowerPoint, select the picture, go to the “Format” tab, choose “Color,” and then select “Grayscale” to convert it to black and white.
Stay tuned for tips and tricks to take your presentations to the next level!
Key Takeaways:
- Highlight specific elements by turning pictures into black and white in Powerpoint.
- Create a vintage or retro look by adjusting saturation levels.
- Enhance contrast and clarity by experimenting with different saturation levels.
Why Turn Pictures into Black and White in Powerpoint?
Converting images to black and white in PowerPoint serves various purposes, such as highlighting specific elements, creating a vintage or retro look, and enhancing contrast and clarity.
When turning pictures into grayscale tones, highlighting specific elements becomes more effective as colors distractions are eliminated, directing the viewer’s attention to the subject’s core details. This technique can be particularly useful in presentations where the focus needs to be on particular aspects of an image.
The vintage or retro look achieved by converting images to black and white can evoke a sense of nostalgia or timelessness, adding a unique aesthetic appeal to the overall design.
Another significant benefit is the enhancement of contrast and clarity. Black and white images can provide better visual clarity, making it easier for the audience to perceive details, especially in situations where color variations may not be essential for understanding the content being presented.
Highlighting Specific Elements
Converting pictures to black and white in PowerPoint can help in emphasizing specific elements within an image, drawing attention to key focal points or details.
By converting images to black and white, you can create a timeless and artistic appeal that enhances the visual impact of your presentations. Black and white conversion can also help in reducing distractions caused by color variations, allowing viewers to focus more on the overall composition. This technique is particularly useful in photography portfolios, where it can unify the aesthetic of diverse images. Using shades of gray can add depth and contrast to your visuals, making them more striking and memorable.
Creating a Vintage or Retro Look
Transforming images into black and white in PowerPoint can evoke a vintage or retro aesthetic, adding a nostalgic vibe to presentations or design projects.
Black and white images have a timeless appeal, creating a sense of classic elegance and simplicity that can enhance the overall look and feel of your visual content. When opting for this monochromatic style, it’s essential to consider the contrast levels, as deep blacks and bright whites can significantly impact the mood and visual impact of your images.
Furthermore, adjusting the brightness and shadows can help in achieving the desired retro effect. By experimenting with different filters or effects, you can customize the aesthetic to match your specific theme or message, whether it’s a historical presentation, a vintage-style poster, or a nostalgic photo slideshow.
Enhancing Contrast and Clarity
By converting images to black and white in PowerPoint, contrast and clarity can be enhanced, making details stand out and improving visual impact.
This process not only boosts the contrast between different elements within an image but also helps in highlighting subtle nuances that may have been overshadowed in a color image. When images are devoid of color, the focus shifts towards the shapes, textures, and lines, allowing viewers to perceive the content in a more striking and crisp manner.
Removing color distractions can significantly enhance the readability of the image, making it easier for the audience to grasp the intended message at a glance. The absence of color can create a timeless and elegant feel, adding a touch of sophistication to any design.
Step-by-Step Guide to Turning Pictures into Black and White in Powerpoint

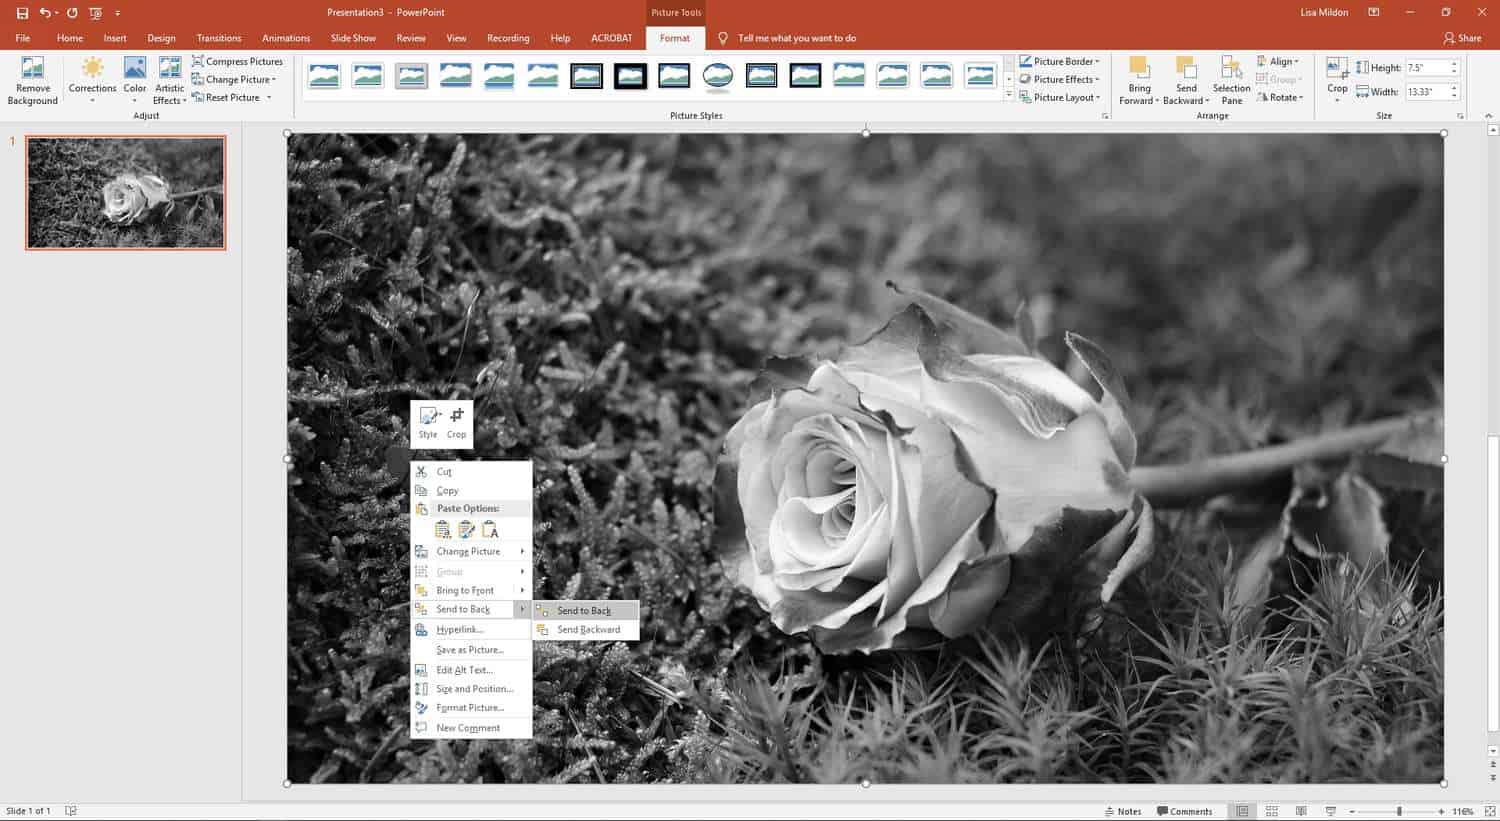
To convert pictures to black and white in PowerPoint, follow a step-by-step process that involves inserting the image, accessing the Picture Format options, and adjusting color settings.
First, open your PowerPoint presentation and go to the slide where you want to add the black and white image. Click on the ‘Insert’ tab in the top menu, then choose ‘Picture’ to upload the desired image from your computer. Once the image is inserted, click on it to select it.
Next, navigate to the ‘Picture Format’ tab that appears on the menu bar. Look for the ‘Color’ option within the ‘Adjust’ group. Click on it to reveal a drop-down menu with various color options.
Select the ‘Grayscale’ option from the list. This will instantly convert your image to black and white. If you want to further adjust the contrast or brightness, you can do so by selecting ‘Corrections’ or ‘Artistic Effects’ from the same menu. Experiment with these settings until you achieve the desired black and white effect.
Inserting the Picture
Begin by inserting the desired picture into your PowerPoint slide, either from your local device or by using stock images for added visual appeal.
When choosing images for your presentation, opt for high-quality, relevant visuals that support your content. Consider using pictures that align with your message and engage your audience. Stock image websites like Shutterstock, Unsplash, or Pexels offer a wide range of options to enhance your slides with professional-looking graphics.
To ensure your visual content stands out, aim for simplicity and clarity. Avoid cluttered images that may distract from your key points. Remember to optimize your pictures by adjusting their size, position, and resolution to complement your slide layout.
- Respect copyright laws when sourcing images, ensuring your selections are either original, free to use, or properly licensed.
- Experiment with different layouts and arrangements to find the most visually appealing way to present your pictures within the slide.
- Use image borders, shadows, and effects judiciously to enhance your visuals without overwhelming your audience.
Selecting the Picture and Opening the Format Picture Pane
After inserting the picture, select it and open the Format Picture pane in PowerPoint to access a range of editing options and adjustments for the image.
Once you have the image selected, navigate to the ‘Format’ tab on the PowerPoint ribbon. From there, you will find the ‘Format Picture’ option, often represented by an icon that looks like a paintbrush or a palette. Click on this to open the Format Picture pane, where a plethora of editing tools and customization features await.
Within the Format Picture pane, you can adjust aspects such as brightness, contrast, color saturation, and more. You can crop the image, apply artistic effects, add borders, and even change the shape or size of the picture to suit your presentation needs.
For further fine-tuning, delve into the ‘Picture Styles’ section within the pane, offering various pre-set design options like frames, shadows, reflections, and more, to enhance the visual appeal of your image effortlessly.
Choosing the Color Saturation Option
Opt for the Color Saturation option in the Format Picture menu to prepare the picture for black and white conversion by adjusting the color intensity levels.
Color Saturation plays a vital role in setting the foundation for a successful black and white image transformation. By manipulating the color intensity, you can control how vibrant or muted the colors appear. This option not only impacts the overall color tones but also influences the contrast and luminosity, which are crucial elements in achieving a visually striking monochromatic effect.
When adjusting the Color Saturation, consider how it will translate in black and white. Higher saturation levels can lead to more dynamic grayscale tones, while lower levels create a softer, more subdued look. Finding the right balance is key to ensuring that the final black and white image maintains its intended aesthetic appeal.
Adjusting the Saturation Levels
Fine-tune the saturation levels of the image using the adjustments within PowerPoint to achieve the desired black and white effect while retaining image quality.
Adjusting saturation levels in PowerPoint can significantly impact the overall tonality of your images. By lowering the saturation, colors are desaturated, leading to a more grayscale appearance that enhances contrast and visual interest. This adjustment is crucial when preparing images for black and white conversion as it ensures that the details and textures remain sharp and defined. Finding the right balance between saturation and contrast will result in visually striking black and white images that captivate your audience.
Previewing and Saving the Changes
Before finalizing the process, preview the black and white effect on the picture in PowerPoint to ensure the desired outcome, then save the changes for future use.
It is crucial to undertake this step to maintain quality assurance in your presentations. By checking the effect beforehand, you can rectify any potential discrepancies, ensuring a polished and professional appearance. Saving the edited images within your presentation ensures easy access and convenience when revisiting or sharing it with others.
Practicing good file management habits is essential. Organize your images appropriately within the presentation’s folders or linked directories. This not only enhances efficiency but also aids in keeping track of resources and simplifies collaboration with colleagues.
Tips and Tricks for Turning Pictures into Black and White in Powerpoint
Enhance your black and white image conversion skills in PowerPoint with handy tips like using the Grayscale option for quick effects, experimenting with saturation levels, and blending black and white with color for unique visuals.
When utilizing the Grayscale option in PowerPoint, remember that it can provide a quick and easy way to convert your images to black and white. If you want more control over the final result, consider adjusting the saturation levels manually. This allows you to fine-tune the intensity of the black and white effect, bringing out specific details or tonal ranges.
Another creative approach is to blend black and white elements with color in your images. By selectively desaturating certain parts while leaving others in color, you can create visually striking compositions that capture attention and convey a powerful message.
Using the Grayscale Option for a Quick Effect
The Grayscale option in PowerPoint offers a quick and efficient way to convert images to black and white, simplifying the process and delivering instant visual impact.
One of the significant advantages of using the Grayscale option is that it helps in enhancing the clarity and focus of images, making them more impactful for presentations. By removing colors, it can draw attention to the content and key elements within the image.
The simplicity of black and white images can evoke a classic or artistic feel, adding a touch of elegance or nostalgia to your slides. It can also make complex visuals easier to interpret and can unify images that have varying color schemes.
Using the Grayscale option can contribute to a more professional and cohesive look throughout your presentation, especially when working with diverse image sources.
Experimenting with Different Saturation Levels
Explore the various saturation levels available in PowerPoint to customize the black and white effect on images, allowing for creative experimentation and unique visual styles.
Adjusting saturation levels in PowerPoint can elevate the visual impact of your images, whether you prefer a more vivid, colorful look or a subtle, muted tone. By finding the right balance, you can enhance the overall appeal of your presentation slides and captivate your audience. A higher saturation level intensifies colors, making them pop, while a lower saturation creates a softer, more understated effect.
Experimenting with saturation levels also allows you to convey different emotions and moods within your visuals. For instance, saturated images may appear vibrant and energetic, ideal for lively presentations, whereas desaturated images can evoke a sense of nostalgia or sophistication.
Combining Black and White with Color for a Unique Visual Effect
Blend black and white images with color elements in PowerPoint to create visually striking and unique compositions that offer a fresh take on traditional design aesthetics.
When combining black and white images with color in PowerPoint, it’s essential to consider the balance and visual hierarchy. Start by selecting high-quality images that will serve as the foundation of your composition. Next, strategically introduce color elements to highlight specific areas or create focal points. Utilize techniques such as color overlays, gradients, or transparent shapes to seamlessly integrate the black and white with vibrant hues. Remember to adhere to basic design principles like contrast, emphasis, and unity to ensure a cohesive and impactful visual outcome.
Conclusion and Additional Resources
Mastering the art of turning pictures into black and white in PowerPoint opens up a world of creative possibilities, allowing for impactful visual storytelling and design versatility.
By converting images to black and white in PowerPoint, it is possible to create a timeless and elegant aesthetic that can elevate presentations, slideshows, and graphic design projects. This technique not only adds a touch of sophistication but also helps in emphasizing key elements within the images, making them visually striking. The grayscale effect achieved through this process can evoke emotions, highlight contrasts, and improve the overall composition of the visual content.
Frequently Asked Questions
How do I turn a picture into black and white in Powerpoint?
To turn a picture into black and white in Powerpoint, first insert the picture into your slide. Then, click on the picture to select it and go to the Picture Format tab. Under the Color section, click on the dropdown arrow and select “Grayscale” to turn the picture into black and white.
Can I undo the black and white effect on my picture in Powerpoint?
Yes, you can undo the black and white effect by simply selecting the picture and going back to the Picture Format tab. Under the Color section, click on the dropdown arrow and select “Reset Picture” to revert the picture back to its original color.
Is it possible to adjust the intensity of the black and white effect in Powerpoint?
Yes, you can adjust the intensity of the black and white effect by selecting the picture and going to the Picture Format tab. Under the Color section, click on the dropdown arrow and select “Saturation”. From there, you can adjust the slider to increase or decrease the intensity of the black and white effect.
Can I apply the black and white effect to only a part of my picture in Powerpoint?
Yes, you can apply the black and white effect to only a part of your picture by selecting the picture and going to the Picture Format tab. Under the Color section, click on the dropdown arrow and select “Recolor”. From there, choose “Grayscale” and use the “Set Transparent Color” tool to select the parts of the picture you want to keep in color.
What if I want to add a color filter to my black and white picture in Powerpoint?
You can add a color filter to your black and white picture by selecting the picture and going to the Picture Format tab. Under the Color section, click on the dropdown arrow and select “Picture Color”. From there, you can choose from a variety of color filters to apply to your black and white picture.
Can I turn a picture into black and white using a keyboard shortcut in Powerpoint?
Yes, you can turn a picture into black and white using a keyboard shortcut in Powerpoint. Simply select the picture and press “Ctrl + G” to bring up the grayscale menu, then press “G” again to apply the effect.
Leave a Reply